I feel so proud of what I have learned and been able to bake throughout this sourdough journey. I certainly am not an amazing sourdough baker yet, but I’m on my way towards it. I definitely still struggle with my regular sourdough bread recipe, I haven’t managed to have consistency throughout all my bakes. I think my biggest issue is in the rising time and conditions. I often get impatient with the bulk fermentation, or the final rise, and cut it short, resulting in a more dense loaf. I thought my loaves were decent and then I went home and had my mums bread which is so incredibly light. That’s something I’ll be striving towards.
I would say some of the highlights for me on this journey were the sourdough doughnuts I made, those were so delicious, and really so easy.
Sourdough Doughnuts made by me
Another highlight for me was the sourdough Khachapuri. These were so delicious and we ate them with homemade borscht. They were easy to make and incredibly tasty.
I’m actually really thankful for this process, it gave me time and justification to indulge in this project that I’ve been wanting to learn about. Now I feel more confident in my ability to make bread and food for myself and my family. It’s cost effective and better for us.
I love cinnamon buns, and I (maybe controversially) think they do not need icing if the bun itself is good. I’m going to make them with the same method as my mum, but instead of a yeast recipe I’ll use a starter recipe.
I think the key part is that you bake them close together, and as soon as they come out of the oven you flip them upside down so that all that sugary caramel sauce drips through them again – it’s like icing in and of itself! Here’s a picture of some vegan cinnamon buns (regular yeasted dough) I made a few years ago, just to show what I mean when I say you flip them upside down to serve.
Who doesn’t love Focaccia, sourdough or not! Focaccia is such a delicious bread that you can top however you like. I’m partial to a really simple focaccia with salt and rosemary, and then eat it hot out of the oven, cut it up and dip it in olive oil and balsamic vinegar.
I will be using this recipe from Alexandra’s Kitchen. When it comes to time, when working with sourdough, it is entirely environment dependant. This suggests letting the dough proof for between 4-18 hours. How is anyone supposed to know how much time it will really need?! Well, this is why baking requires skills of observation. The author of this recipe is smart to suggest that you allow your dough to rise in a transparent tub so that it easy to monitor the growth of your dough. This way, you do not have to worry about the time so much, it’s way more about the growth of your dough – which you can observe. Because in summer, in a warm kitchen, the first rise would probably only need 4 hours, but in winter it may need the full 18 hours.
Like most sourdough recipes I do, I will be making these in the evening, and allowing them to rest overnight on my counter (my house is not that warm, and it’s nearing winter so I don’t expect it will over proof).
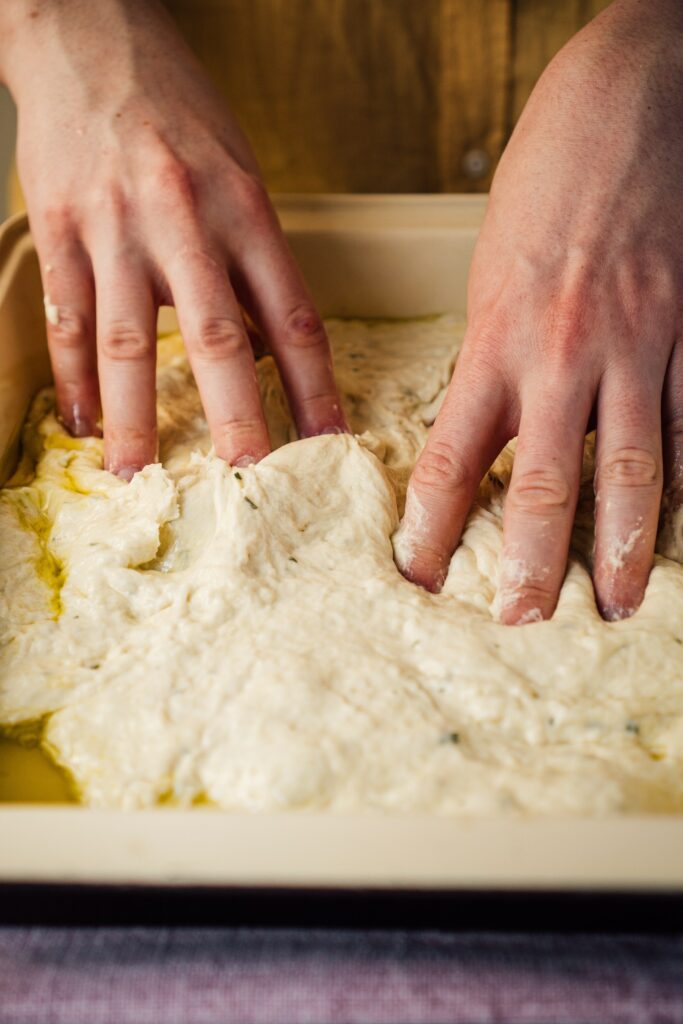
The key for focaccia is the second rise in the baking dish. After it’s doubled its size during the first rise, you pull it out into a baking dish that has olive oil in it. Then it needs to rise (likely) at least 4 hours. The dough needs to be puffy and almost doubled in size. Then comes the verrrrry fun part of baking focaccia.
When the second rise/proof is complete, you drizzle the dough with olive oil and push your fingers all the way down to the bottom of the dish. Check out this very satisfying video by Shebakesourdough (Jade Lim).
By doing this you create the iconic aeration and bubbles of focaccia. In this video by Shebakesourdough Lim is doing delicious pesto and cherry tomato topping, which I would definitely like to try but as I said, I’m partial to a very simple focaccia topping.
If you try to make your own focaccia, do not fret if it doesn’t look as amazingly bubbly and beautiful as Lim’s she’s an expert. Mine won’t look like that – I’m finding my biggest issue with baking sourdough is my lack of patience to let things rise fully. Focaccia really needs that long rise time so I’ll have to be patient.
So, I joined a facebook page about sourdough baking called Sourdough Geeks, follow the QR code below to check it out.
It can be overwhelming because there is so much information on there, and SO many opinions (that sometimes vary) but in general I’m finding it to be an awesome resource. One of the best things is that if people are having issues with their bread, they’ll post a picture and their recipe and everyone comes to their aid to help out with suggestions and feedback.
However, this week when I went to make my usual loaf of sourdough bread (I decided to make two this week) I realized that I timed feeding my starter incorrectly. Ideally, you would follow a schedule such as:
7am – Feed Starter, leave out on counter all day
5pm – Make bread dough
9pm – Bulk fermentation is done, put in fridge overnight
8am – Bench rest bread, then shape and rest in bamboo dish, then bake
What I did wrong was I took my starter out of the fridge and fed it in the late afternoon (Ideally I should have just waited until later in the evening) and then I realized that I wouldn’t have the hands-on time needed for the bulk fermentation the next morning. So, I thought I would have to discard from the starter and try feeding it again the next night, but I saw on the facebook page an alternative. By chance, a post came up that stated that some people use their starter straight out of the fridge! They suggested making the water warm if you use cold/refrigerated starter, but thats it!
I tried it out. I put my fed starter in the fridge overnight until the next evening, and then I pulled it out and used it as I would normally (with the addition of warm instead of room temp water). I continued the process as normal, I did an overnight rise of my dough after the bulk fermentation. Today, I have two great loves of sourdough bread!
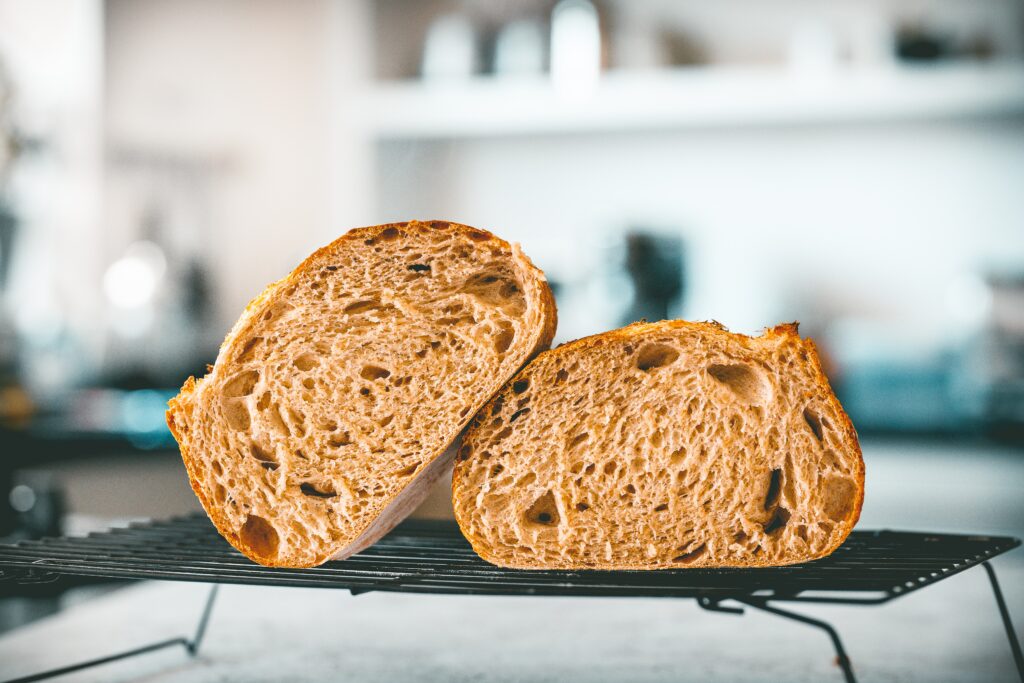
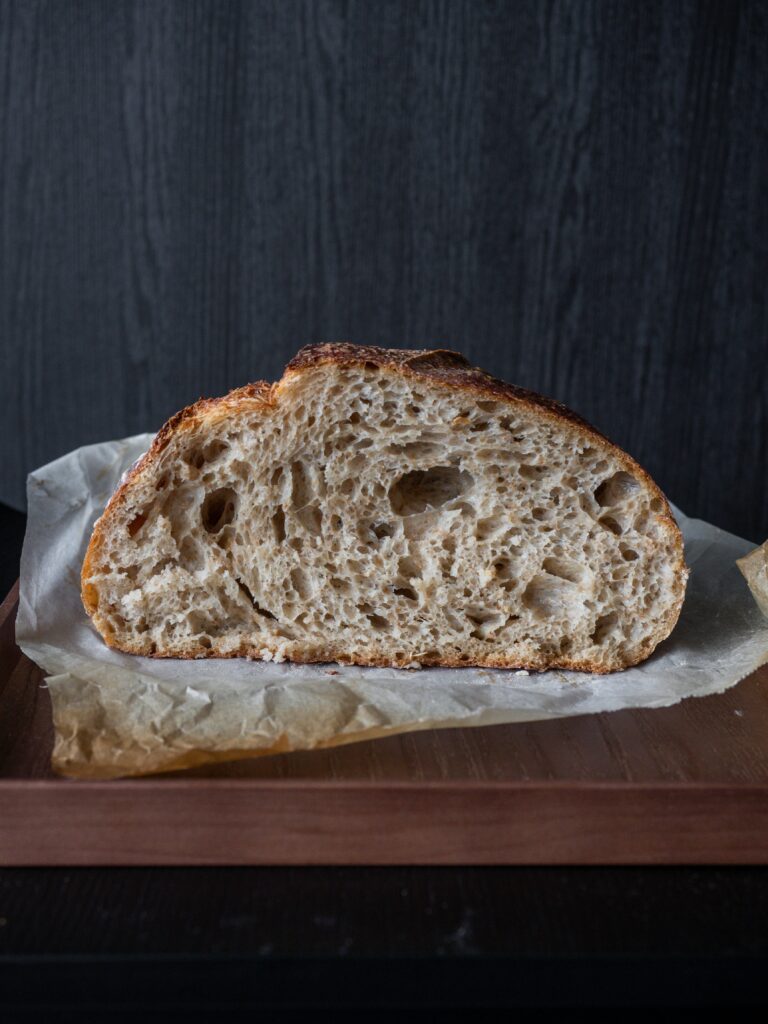
What About the Crumb?
My main concern was the crumb of my bread. Wait, what does the crumb mean? The crumb refers to the texture inside your bread. On the Sourdough Geeks facebook page there are tons of images of people struggling with their crumb. I suggest checking it out!
I was worried that since I used the cold starter the bread would not rise as normal, however, my loaves turned out great! The crumb was really nice, similar to the photo above, maybe a little less open. While this was great to learn, that you can use your starter cold straight from the fridge, I won’t default to using it that way. In a pinch though, or due to poor planning, it’s great to know it works!
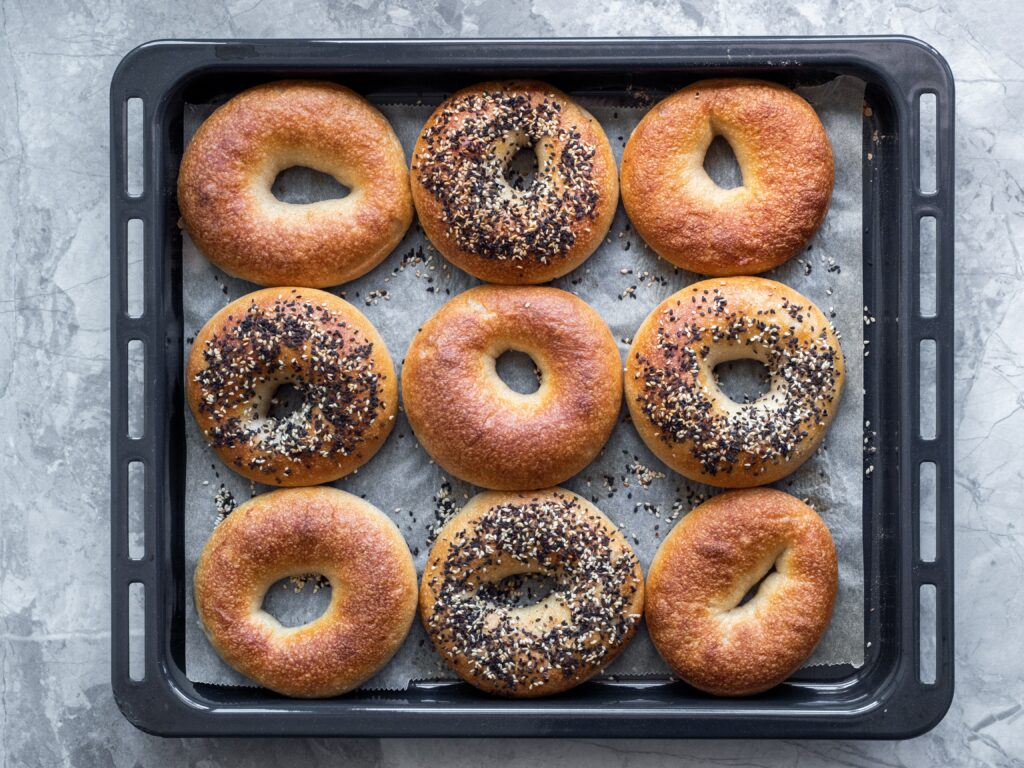
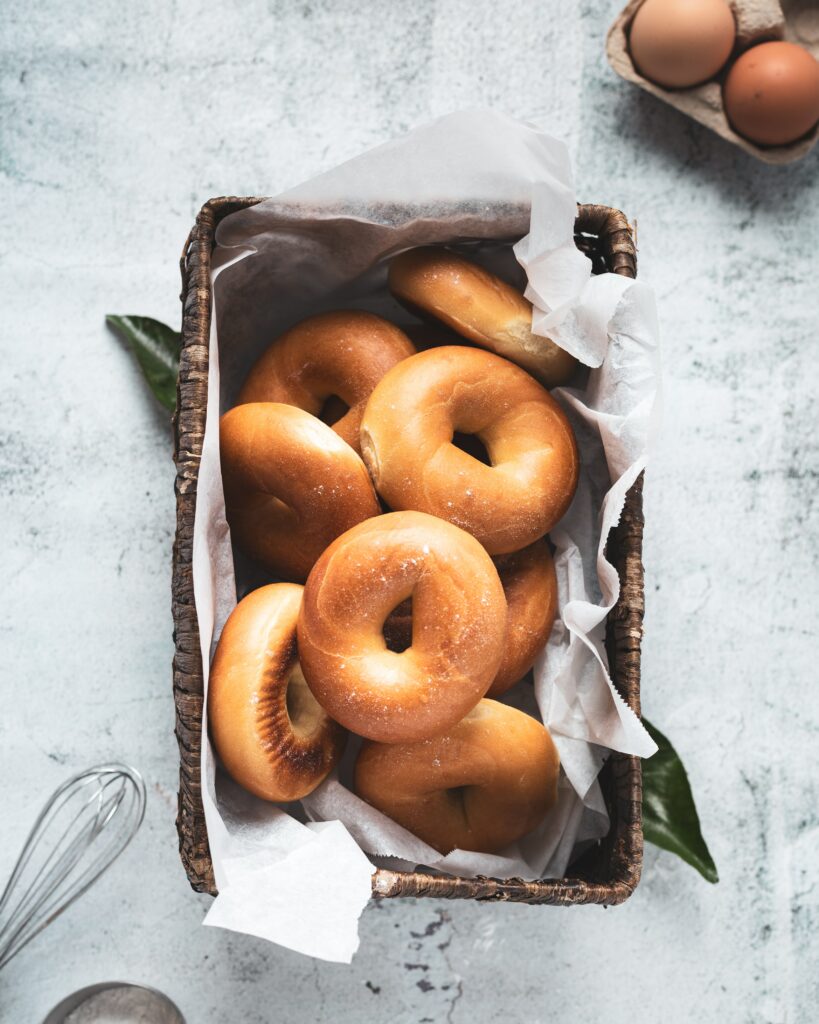
Who doesn’t love bagels? Bagels are one of those things that people think are quite complicated to make because they have to be boiled and then baked – but I’m here to tell you they are not hard to make. I have made them many times with yeast, and they’re incredibly easy to make and so delicious. Way better than any bagels you would get at the grocery store.
I’m going to use another recipe from Little Spoon Farm. Their recipes are nice because they already have the weighted measurements so I don’t have to do any conversions. Interestingly, this recipe calls for your dough to sit out (not in the fridge) overnight. Bagels are a fatless dough so theres no issues there (i.e. milk or butter going off), but it still seems a little odd to me!
Something I love about this recipe is that they provide an example of a timeline / baking schedule. This is really helpful for managing how much time you’ll need to complete a sourdough recipe.
This recipe will yield 8 bagels – I’d like to make a double batch so I could fill my freezer with some homemade bagels, but my oven is so small and not very efficient, so it would be very time consuming to bake all 16 bagels in one day.
This recipe calls for sugar in the water that the bagels will boil in, but I’ve always put honey in the water so I will do that instead.
A huge factor in all baking that requires rising or proofing time, but particularly sourdough baking, is temperature. The author of the Little Spoon Farm recipe states that her kitchen is about 20 degrees celsius overnight, and that accommodates her bagel dough to rise in time to bake at 8am the next day. So, I’ll either have to crank my heat overnight for this, or allow for more time than the 12 hours this recipe calls for.
After doing some more research it seems that it’s very common for sourdough recipes to bulk ferment (or rest) on a counter overnight for up to 12 hours. This recipe was easy and turned out great!
Alright, it’s time. I’ve been talking about it for a couple weeks now and this week is the time to attempt sourdough doughnuts! I feel more confident with my starter in general, so it feels like the right time.
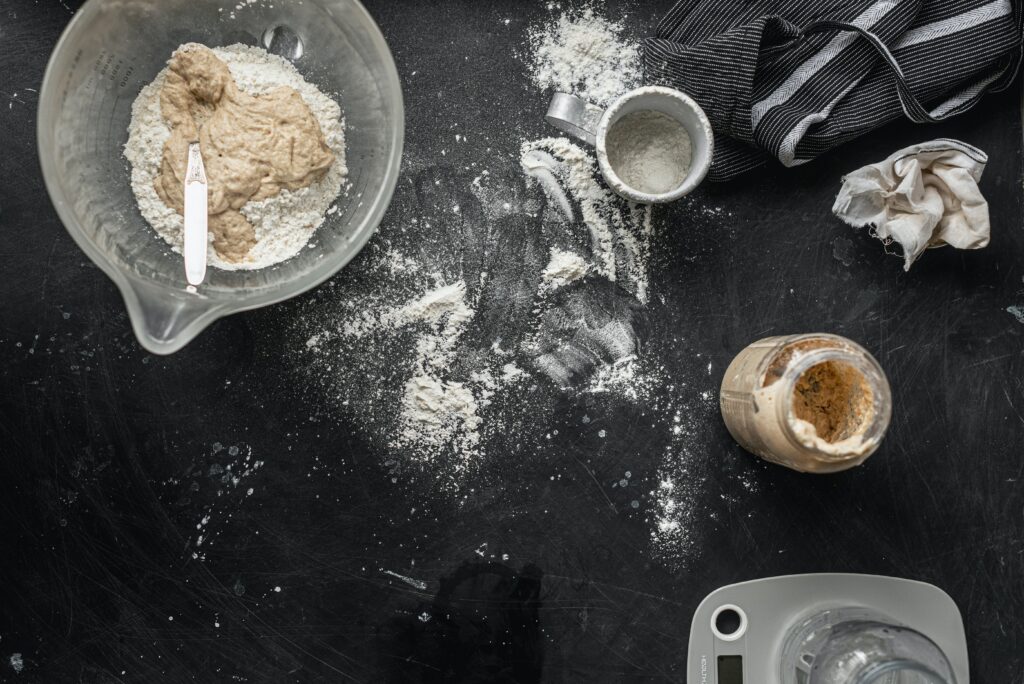
Personally, I’m partial to a simple glazed doughnut. If these doughnuts turn out well, I might have to attempt a jelly doughnut. I’m going to use this recipe by Bless This Mess. Compared to the other things I have been baking, this is a very rich dough. This recipe calls for milk, eggs and butter which is of course what helps to make doughnuts so delicious, rich and light and fluffy! The issue with this recipe for me is that all the measurements are in cups, teaspoon (tsp), tablespoon (tbsp) etc. This is fine when you’re baking at a beginner level, or baking something that is not temperamental, but really ingredients are best measured by weight (I use grams). Sometimes online recipes offer an option to convert the recipe to weighted measurements, if it does I highly recommend you use that.
Why does it matter so much? Aren’t the original measurements fine? Well, this is where cooking and baking are the most different. This article from Food Bloggers of Canada explains why it is so important to weigh your ingredients when baking, here is a direct quote, “baking is a science and it requires all the precision you would expect when doing a chemical experiment”.
This might make baking seem unapproachable, but it’s honestly easier to just weigh things than to measure them all out in cup measures.
The final product of the Sourdough Doughnuts! Doughnut Structure
Well, these sourdough doughnuts were a huge success! They were really easy to make, not a lot of hands on time with these. The dough probably took 15-20 minutes to put together (including a 10 minute resting period), and then it has a long proofing time 3-6 hours. I think I proofed mine for 3 hours or just under, and it’s a hands off proof – no stretching or folding. Following the first rise I rolled the dough and cut out the doughnut and doughnut holes (I used a jar lid and a water bottle cap because I didn’t have the proper cookie cutters), and left the cut out doughnuts for another 1-2 hours. The doughnut holes took 35 seconds per side to fry, and the doughnuts took about 70 seconds per side. So fast and easy, and then I just dropped them in the delicious and easy glaze icing.
I will definitely be making these again! I might experiment with proofing the dough in the fridge overnight to see if they develop a nice sour flavour.
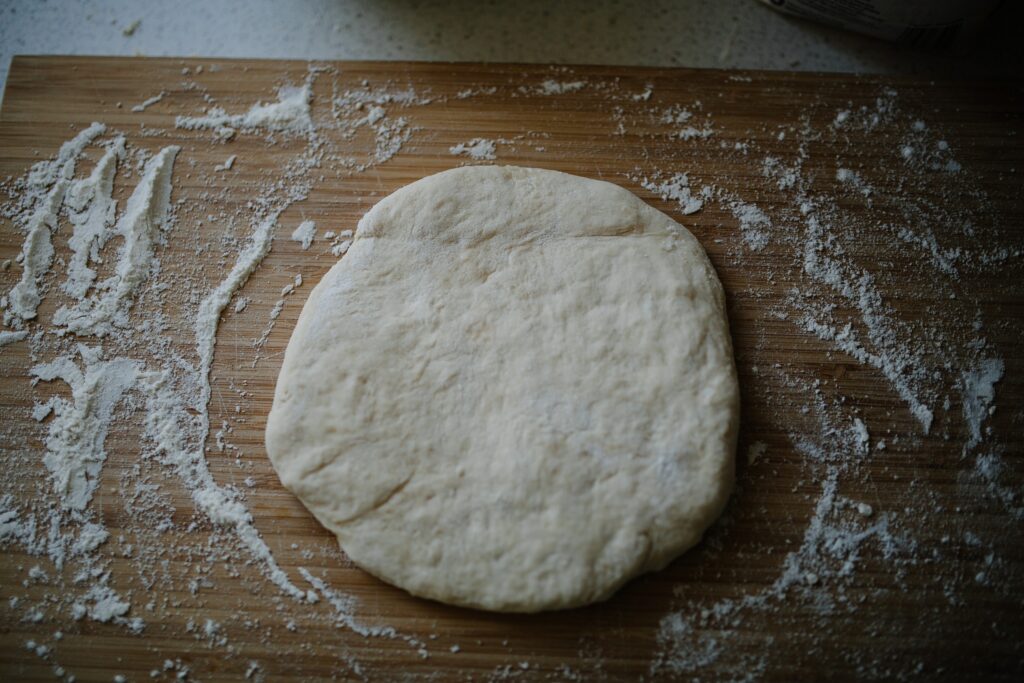
This week I’m making both, a regular country sourdough loaf from Chad Robertson’s Tartine Bread, and I’m trying a khachapuri for the first time!
Khachapuri is a Georgian cheese bread. I had my first introduction to Khachapuri from my friend who is a Doukhobor and whose family originated from Georgia. I am, of course, making a sourdough version. It just fell into place for me this weekend. I knew this was a special dish to my friend, my husband wanted to make borscht, and my favourite sourdough instagram account, Shebakesourdough (Jade Lim) posted an awesome video of her making Khachapuri. Check out this QR code to watch the video on Shebakesourdough’s Instagram.
Shebakessourdough, Jade Lim, Khachapuri reel
Luckily, the recipe Shebakesourdough shared calls for the dough to be rested in the fridge overnight – which is my favourite way to handle sourdough. It’s a very simple recipe: flour, water, salt, starter and olive oil. Shebakesourdough often does “coil folds” for her sourdough I’ve noticed, instead of turns. So, I have my Khachapuri dough in a glass container with a lid and I’m doing the coil folds, and I’m doing turns for the country sourdough loaf.
This weekend I will be home visiting my family, which means I get to see the bakery in action. My parents own and operate a farm, Northend Farm. As I’ve mentioned in a previous post, my mum is locally famous for her sourdough bread and cinnamon buns – if you need proof, check out this article.
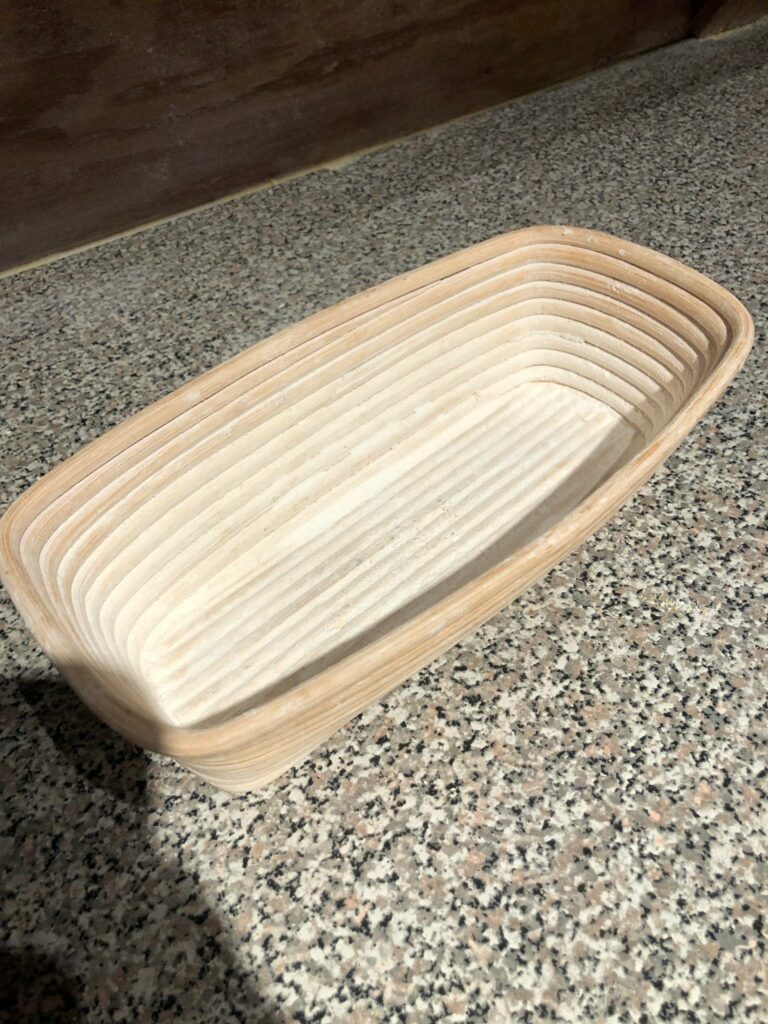
Now that I’m done hyping up my parents’ business, I’ll get down to it. This weekend I decided to focus on all the tools you need for sourdough baking. No, you do not have to run out and buy tons of things – but if you want to be baking at a high level you will want to acquire some of these things over time.
First we have a bamboo bread basket. These really are key for baking sourdough bread because generally sourdough is not baked in any sort of pan where it will hold the breads shape. So, after your bench rise you would do a final rise in one of these bamboo baskets.
Bamboo bread basket
When it’s time to bake you would spread some cornmeal on top of the bread, and then flip it out on to one of these bread paddles.
Bread paddle
Once the bread is on the bread paddle you would quickly score your bread with a razor.
Razor for scoring bread
With the bread scored it’s into the oven! For this style of baking sourdough bread you would need a baking stone in the oven. That’s why you have the cornmeal on the bread, so you can slide them off the paddle and on to the baking stone in the oven. These are four (only three pictured) tools you need for baking sourdough bread!
If you are interested in checking out some sourdough bread maker creators online, I would highly recommend Jade Lim, (Shebakessourdough on Instagram). Her videos are fun and inspiring, even if you’re not a baker they are great to watch!
This week I decided to try Sourdough English muffins! I made a screencast of my process this week, so you can either watch and listen – or read about it!
I decided to look online to find a recipe for Sourdough English muffins and I went at first went with one I found on King Arthur. However, then I noticed that recipe called for active dry yeast as well as starter, so I wanted to find a recipe that only asked for starter. I ended up using a recipe from Little Spoon Farm. But really neither of these recipes were perfect. The King Arthur recipe said I could put the dough in the fridge over night (this is what develops the delicious sour flavour) but it called for active dry yeast as well, the Little Spoon Farm recipe did not call for yeast, but did not say to put the dough in the fridge overnight. So, I went with my gut and decided to take what I wanted from both recipes.
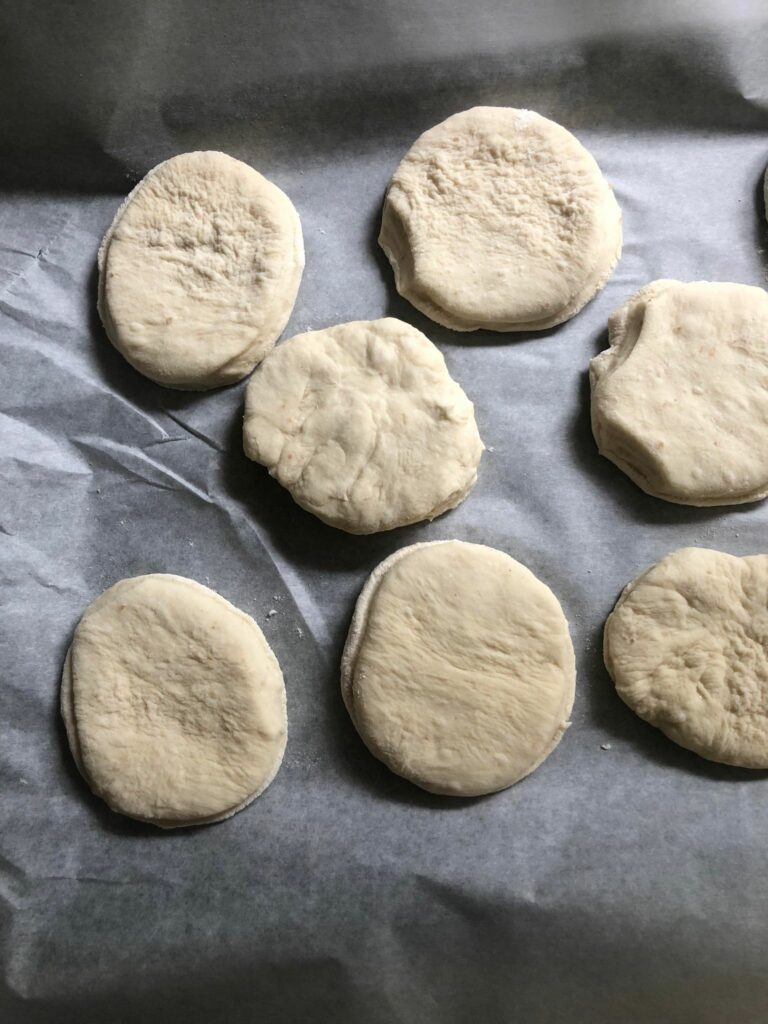
My English muffins cut out and ready for a final rise
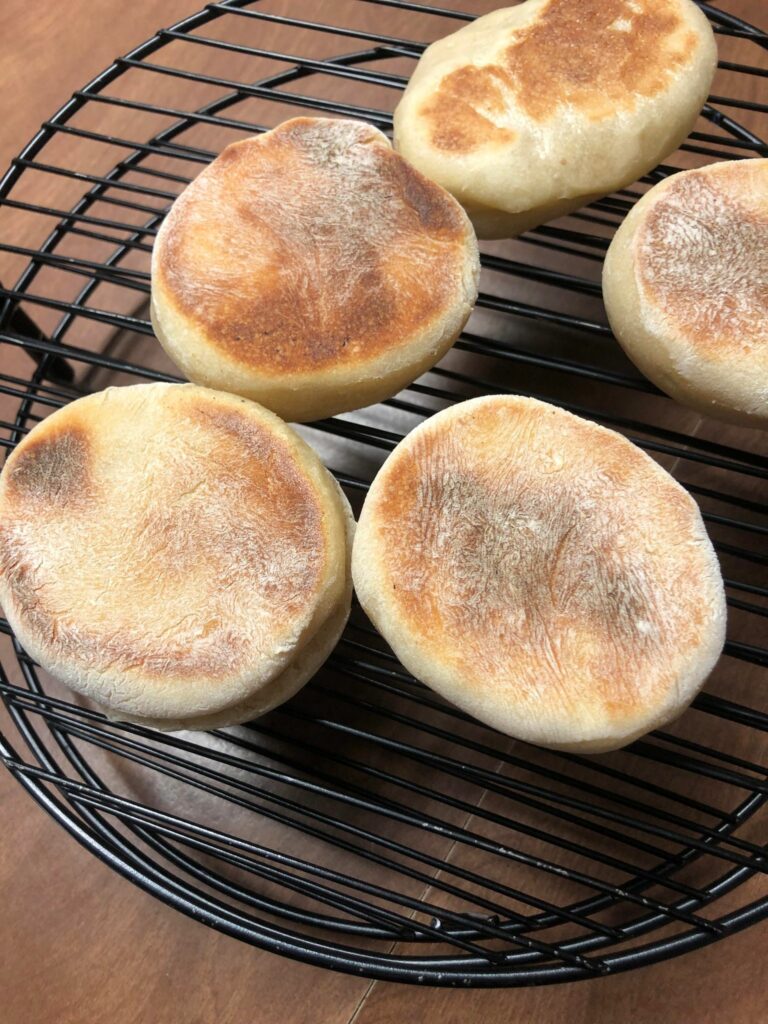
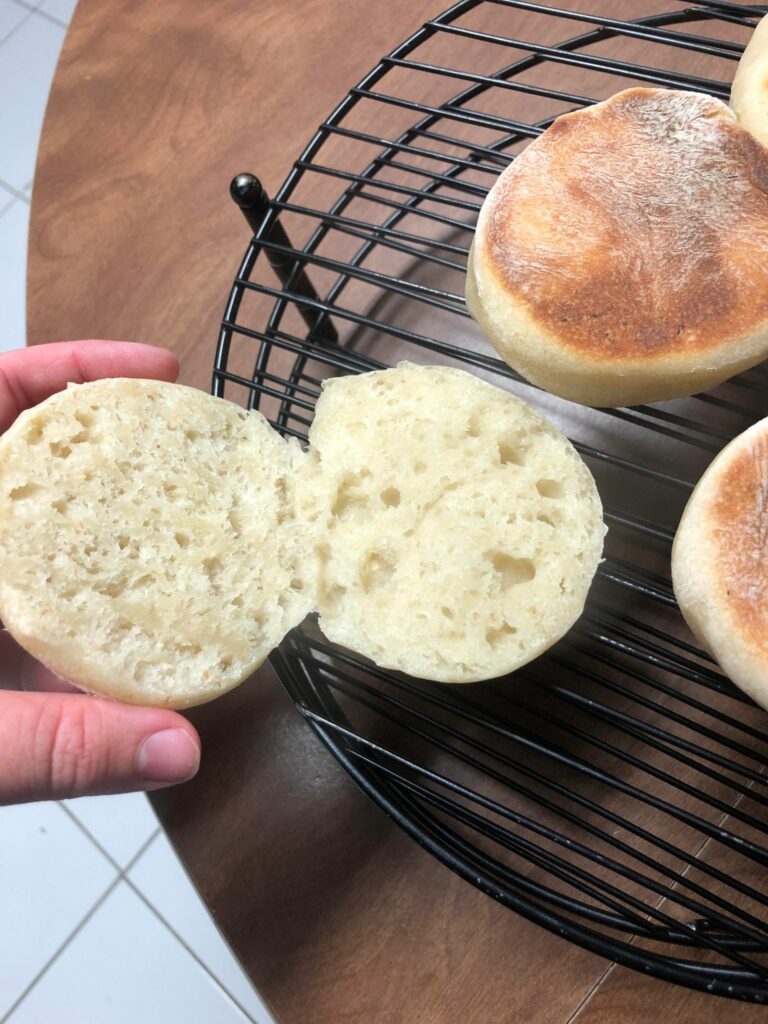
I am not great at following fastidious recipes. If you watched my video you’ll see that I even have a hard time getting my recipes exact (108 grams versus 100 grams). for what I wanted. I’m hoping if I continue practicing my sourdough baking, I will be able to trust my gut more and know what I can and cannot do with certain doughs. My English muffins were not perfect, but honestly they turned out really well. Even if you do not want to watch the full video I posted, just skip to the very end to see a photo of the final product. Not bad for a first attempt.
Finished English muffins
If you want to try making sourdough English muffins either of these recipes would be good. There is no harm in using yeast and starter, I just want to try purely sourdough recipes for now. That may change, as time goes on – we’ll see. The great thing about English muffins is that you can make them savoury or sweet! I think I’ll have to have a breakfast sandwich tomorrow, or butter and jam!
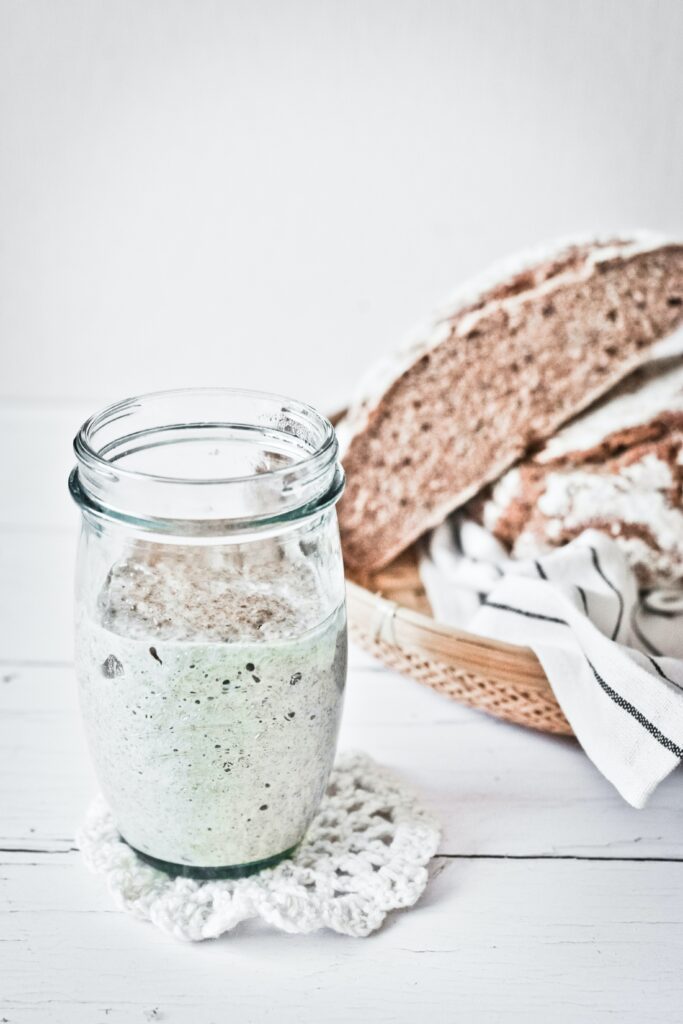
This week I decided to start by baking sourdough bread. Sourdough bread is near and dear to my heart because my mum actually has a bakery and is (locally) famous for her amazing sourdough bread. My mum gifted me some of her starter, it almost feels like a family heirloom
What is sourdough? Sourdough ‘starter’ is a natural leaven that is made from flour and water. This combo sits on your counter to create an active colony of natural yeast and (good) bacteria. To create a starter, it takes one to two weeks and it requires a process of ‘feeding’ the starter and discarding it. However, I was able to skip this step because I inherited some of my mum’s starter.
My mum also lended me one of her recipe books, Tartine Bread by Chad Robertson. She warned me that it’s very wordy and overly fastidious. I’m making the country bread from the Tartine Bread book. My mum was right, the instructions are made overly complicated. I suppose the purpose is so that you fully understand the process, but it makes it somewhat unapproachable.
Making sourdough is a simple but a lengthly and time consuming process. The country bread recipe I’m making requires up to 8 hours, not including bake time! This is my second time making sourdough, the first time I spent nearly all day doing it. This time I split it over two days, I did the bulk fermentation (or bulk rise) and then put it in the fridge overnight. During the bulk fermentation you have to ‘turn’ the bread every 30 minutes. Sourdough bread is not kneaded like traditional yeast bread, instead the dough is stretched and folded in the container it rises in, this is called a turn.
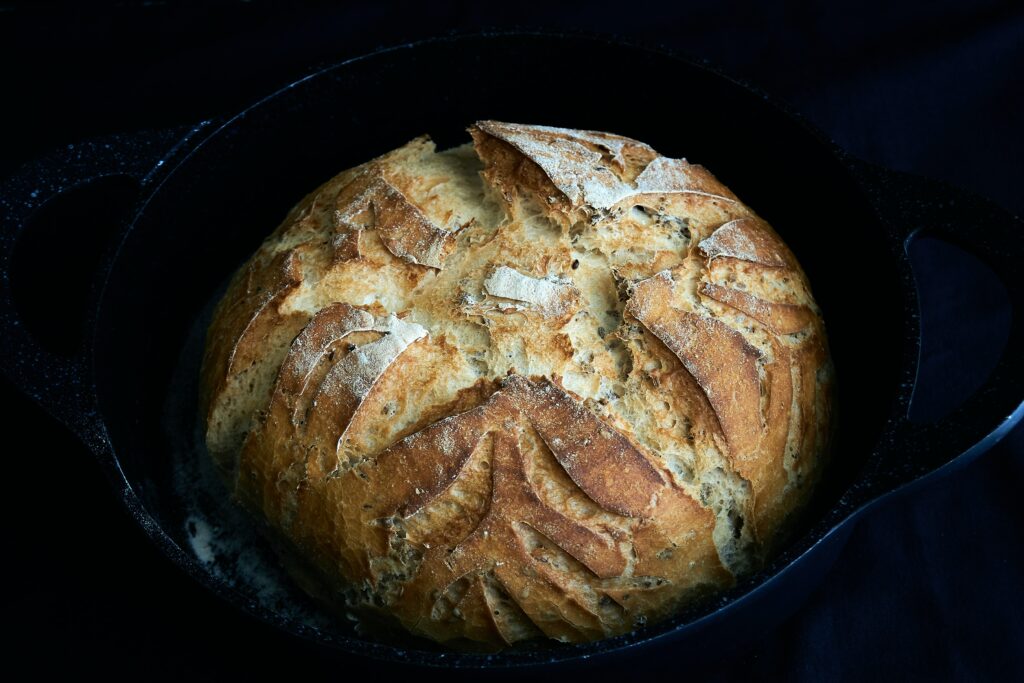
After that, you do a bench rest – which is where the dough rests on the counter. Following this you shape the dough in a serious of folds and let it rest, then it does the final rise in a bamboo proofing basket. My mum bakes her sourdough loaves on a baking stone, I don’t have a stone so I bake my in a dutch oven pot. The pot is almost a fail safe, it produces a perfect round loaf.
I’m happy to report that the bread turned out delicious, but I’m not convinced I have the oven settings quite right. That will be something to address on my next bake.